

Bottom Frame Installation Prep
1. Find 3 L-shaped columns and 2 column supports.
2. Place 3 L-shaped columns and 2 column supports as shown in the video.
3. Place the L-shaped column between the column supports

Fixed bottom frame
1. Take out the screws and screwdriver.
2. Fix the L-shaped column and the column support with screws.
3. Check, you need to install 6 screws.
4.Pay attention to the installation of the middle L-shaped column.Refer to the video for the installation of the middle L-shaped column.

Upper installation preparation
1. Lift up the base structure; it is recommended to first lean the base structure against the wall.
2. Take out the connecting structure between the base and the top, and note that there are 3 connecting structures.
3. First fix the connecting structure to the base structure with a screwdriver.

Top installation and fixation
1. Take out the top structure of the frame.
2. Pay attention to distinguish; connect the shorter section of the top structure to the bottom structure.
3. After aligning the bottom and top structures, fix them with screws.

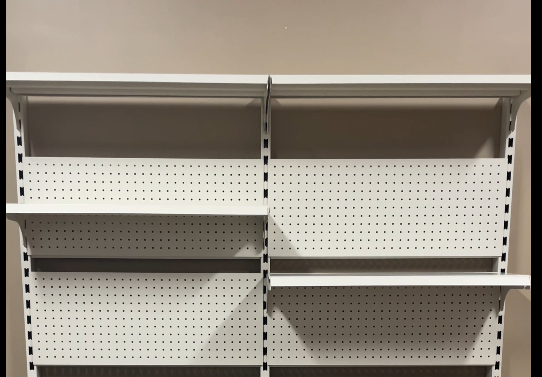
Install the back panel
1. Take out 10 backboards with many holes.
2. Note to backboards between the top and bottom of the backboard: the top of the backboard has two holes, and the bottom of the backboard extends a section.
3. Align the backboard buckle with the frame hole, press down to clamp the frame.
4. Repeat the installation for 10 pieces.

laminate sheet installation
1. Take out the laminate sheet clips that are similar to triangles; there are 8clips.
2. Align the laminate sheet clips with the frame holes, and the alignment method is as shown in the video.
3. Take out 4 laminate sheet.
4. When installing with laminate sheet clips and laminate sheet, they must be aligned properly; please refer to the video.